Series of posts about my homelab

81 posts latest post 2026-10-06
Publishing rhythm
Oct 2026 | 1 posts

My Nextcloud woes

I wrote here about setting up www-data as the owner of any directories you want nextcloud to manage. However, I regularly struggle wtih permissions issues on my NAS because of the external storage app anyways so I’ve decided to just put our photos in the spot Nextcloud would otherwise put them, and use this as healthy pressure on our family to organize our photos and put the ones we care about with the rest of our family media.

Migration

Because I had a ton of photos on the NAS anyways that I wanted moved over to Nextcloud I just rsync’d the photos directory on my NAS to the user’s photos directory in nextcloud but they weren’t showing up in the web UI!

The Fix?

As www-data I needed to php /var/www/nextcloud/occ files:scan --all inside my nextcloud docker container AFTER moving a bunch of photos off my “NAS” into the folder mounted to the nextcloud container as its data folder! Before I did this they weren’t showing up in the web UI/
TIL that when setting up download clients for radarr/sonarr/lidarr/readarr/bazarr/prowlarr that you can utilize internal DNS and instead of hardcoding an IP address of your download client server, can use just the CNAME record (ie. instead of 172.10.14.13 I can use transmission.mydomain.com… notice the lact of http(s)://… adding that won’t allow the connection to work/

Furthermore, you can use internal DNS to lookup the domain, not the subdomain, and expose the port, like mydomain.com:7878 for sonarr. This was simpler to maintain because I don’t change which ports an application exposes or utilizes hardly ever, plus I don’t need to maintain CNAME records for every service!

I ran out of space on the SSD in my server when doing some file transfers but only 100GB was used of a 256 GB SSD?

LVM

When installing Ubuntu live server the default option for how to partition the disk (in my experience) has been to setup an LVM group that defaults to less than the available space. Most recently I put Ubuntu server on a 256 GB SSD but the main partition was formatted as an LVM group with 100GB of storage… I didn’t think anything of this even though I’m mostly used to EXT4.

I think the reason for LVMs is performance, but in hindsight, I don’t really care much about the performance differences, I really just want all my storage that’s fast enough

Extending the LVM

A moment of googling brought me to Ubuntu’s wiki and I learned that I can expand my LVM to the space I need…

sudo lvdisplay and sudo pvdisplay show detailed views of the logical volumes and physical volumes respectively.

Take a look at those and find the volume you need to extend. For me I found this:

  --- Logical volume ---
  LV Path                /dev/ubuntu-vg/ubuntu-lv
  LV Name                ubuntu-lv
  VG Name                ubuntu-vg
  LV Write Access        read/write
  LV Status              available
  ...

There’s more that you’ll see but this is what’s relevant - I need to extend the ubuntu-lv logical volume in the ubuntu-vg volume group.

sudo lvextend -L +50g ubuntu-vg/ubuntu-lv gives me 50 more GB of storage which should be enough for at least tonight 🤓

RTFM

When working with tdarr remote nodes, they need to have access not only to the same libraries but also the same transcode cache as the server otherwise the transcodes will fail…

Network Setup

To explain I’ll give a brief overview of my home setup

I have an old Dell PowerEdge R610 as my main server running a live server distribution of Ubuntu. I use ZFS for my NAS file system, and most of my datasets are accesible over my home network. I have a Tdarr server running in a docker container on the R610.

In my office I dailyi drive a gaming desktop with an Nvidia 2060 Super running Ubuntu as well. On that desktop I am running a Tdarr node in a docker container. The container has access to the network folders with my media.

Initial Magic

When I spun up a tdarr node on my desktop, the tdarr server running on my R610 automatically registered the node, which was freaking amazing. That magic though spoiled me and I thought that I didn’t need to read the rest of the docs…

Initial Fail

I setup a transcode cache directory on the R610 locally and a separate transcode cache on my desktop that the remote tdarr node would use. Having them separated led to 2 main issues:

  1. Transcodes were not being migrated back to my library properly
  2. I was running out of disk space on my desktop because tdarr wasn’t deleting the completed cache files properly.

The Fix

Make a transcode cache directory accessible on my network, and give access to that directory to the docker container running my remote tdarr node.

Spoilers #

Tailscale is way easier than this… I was doing this local DNS overwrite in Pi-hole before running tailscale and I haven’t just totally “kicked the habit” yet, so for anyone NOT running tailcale, but wanting local HTTPS and using Pi-Hole this method would work fine

Intro #

I use pihole as my DNS server at home. I run unbound as well and have a pretty standard setup from their docs.

Pi-hole does 2 primary things for me:

  1. dns sink-hold, the primary use case I believe
  2. local SSL for all my self-hosted apps

Caveat #

I know for sure there are better ways to do this, but there’s also worse ones… so for now this has been my pattern, and it’s only bitten me in the butt when I’ve forgotten to add the final CNAME record… which’ll make sense in a sec.

Process #

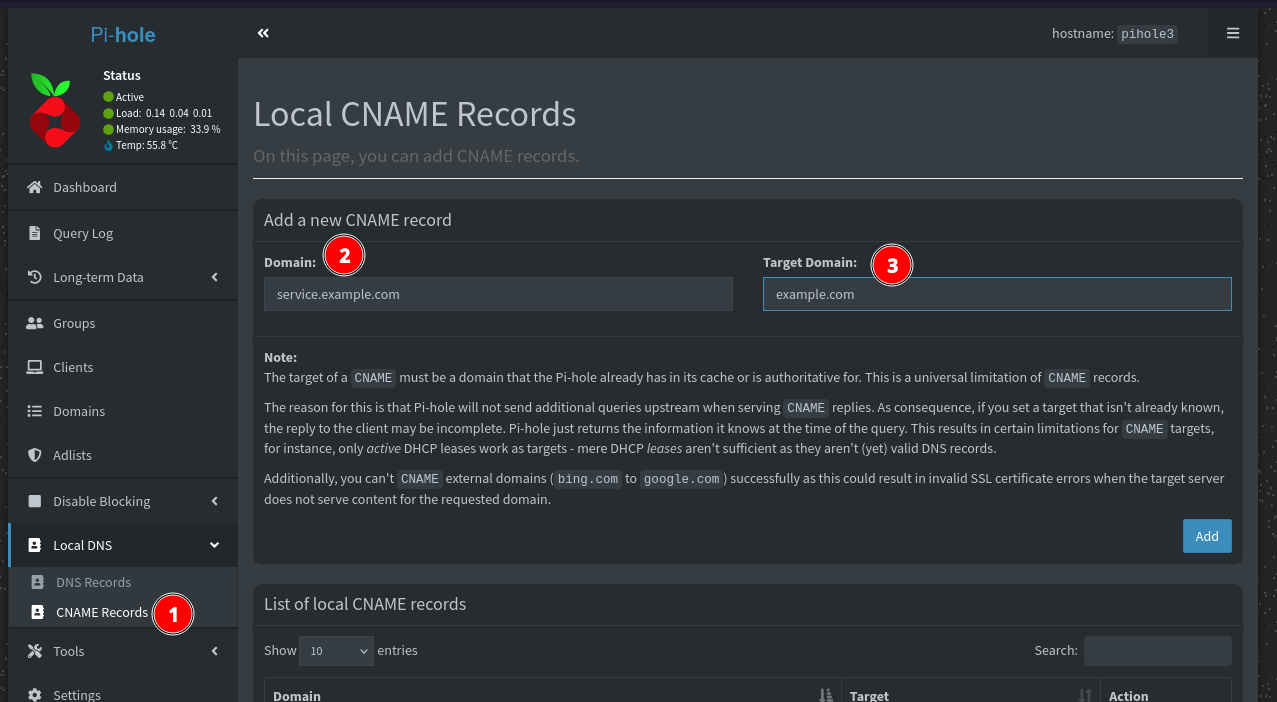
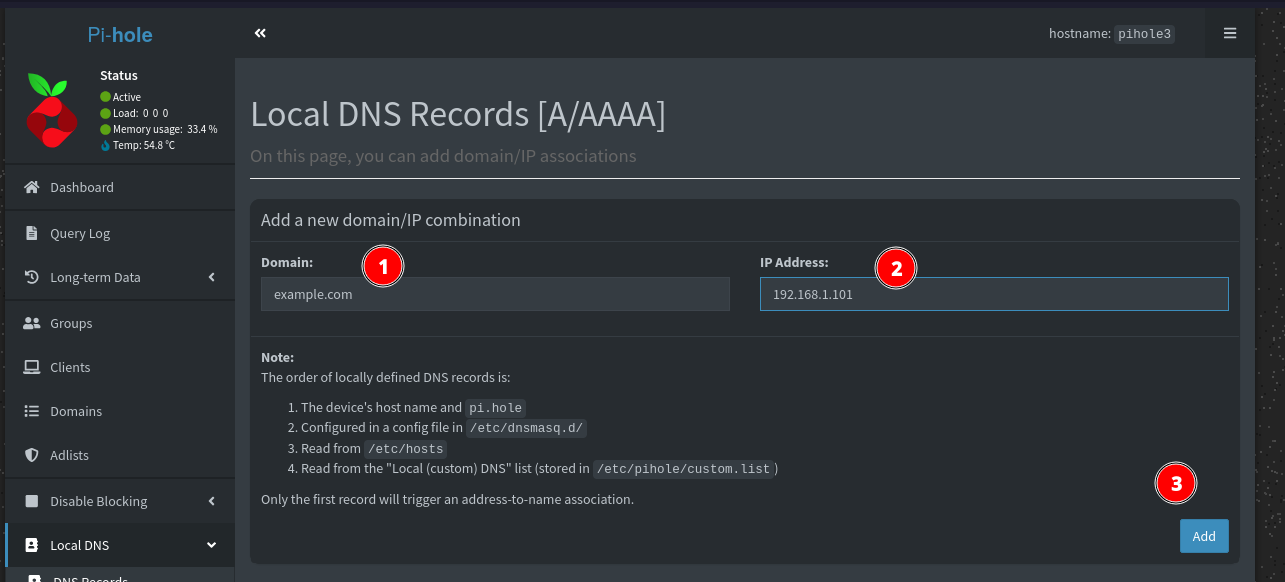
It’s really quite simple - in pihole I have a DNS record for my domain pointing to my primary server

20250706114501_8c34a31e.png

Then for each service that I want to keep everything resolved locally for I add a CNAME

20250706114557_916fb4c4.png

With DNS resolving this way for clients using my pihole, the networking all stays local and I still get HTTPS for my wildcard cert in cloudflare

Why? #

The reasons I do this are simple:

  1. I’ve been doing it since I started homelabbing and it started out of misunderstanding of how networking works at all
  2. I use a home dashboard with https:// links, and it’s nice to just use that same dashbaord publically or at home. With local DNS resolution then I can whitelist some services, but conveniently access over the public url with https but routing such that my whitelist let’s me in when it wouldn’t if I tried to access the service from an external client
  3. it’s my homelab - I can do what I want

It’s too complicated #

Honestly, as simple as this is, it is tedious and kind of complicated… There’s options to make it better…

  1. script any service deployment to update the pihole /etc/host file
  2. just use tailscale…

See 02-….yaml in ansible-nas

I am revamping my home server and bumped myself early up to Jammy Jellyfish… however to my peril I reused my netplan config and after hitting my server with the ‘ol netplan apply I lost connection… DNS still seemed to kinda work externally, but internally nothing was up…

Turns out Netplan got a little change in how to express the gateway key in the netplan config!

Old Ubuntu 20.04 way

network:
  version: 2
  ethernets:
    enp0s4:
      addresses: [192.168.1.{Static IP}/24]
      gateway4: 192.168.1.1  # <-- This changes!
      nameservers:
        addresses: [192.168.1.1, 1.1.1.1]

New jammin way for Jammy Jellyfish (at least that worked for me)

network:
  version: 2
  ethernets:
    enp0s4:
      addresses: [192.168.1.{Static IP}/24]
      routes:
        - to: default
          via: 192.168.1.1 
      nameservers:
        addresses: [192.168.1.1, 1.1.1.1]

TL;DR

As the nextcloud docs say… if you want to write to an external volume that location has to be writeable by the user/group www-data on the host system… so if that makes sense to you then this TIL probably isn’t a ton of value.. if not however, read on :)

Case Study

You want to self-host your own cloud and use a smart file system for convenience… Nextcloud and ZFS are pretty common goto answers for each of those problems.

My home NAS is built on ZFS and among other things I have a zpool named tank and nested in there is a tank/nas dataset with several child zfs datasets under that.

I want to use nextcloud mainly for auto-uploading photos from my wife’s and my phones for automatic backups. The issue is that the nextcloud application (I run in Docker) is fixed as the www-data user and so any volume/folder that you want nextcloud to write to needs to be permissioned such that www-data owns it… but I don’t want www-data to own everything in my NAS… so what’s a girl to do?

Solution

Well, one way to go is to just utilize docker volumes, write the data in the container to /var/www/html and let that be the place your data backsup to.

I still wanted nextcloud to automatically write right to my NAS so I created a nextcloud-upload directory inside of tank/nas/media/photos (photos cause that’s all that gets automatically uploaded)

Then I chown -R www-data:www-data /tank/nas/media/photos/nextcloud-upload so that just that sub-folder is owned by www-data. Now everyone’s happy!

As I was cleaning up my NAS recently I noticed that I ran out of storage even though my disk usage looked pretty low… turns out I was keeping a mega-ton of ZFS snapshots and due to my own ignorance at the time didn’t realize the storage cost of this!

zfs list-o space tank/home will show the disk usage of the dataset and snapshots in tank/home